Advanced Typography: Task 1 Exercises
 22/04/2025 - 13/05/2025 (Week 01 - Week 04)
Shema Goldie Angwen / 0372129
Advanced Typography
Bachelor of Design (Hons) in Creative Media / Taylor's University
Task 1: Exercises 1 & 2
CONTENT LIST
LECTURES
WEEK 1 - LECTURE 1
Advanced Typography: Typographic Systems
"All design is based on a structural system" (Elam, 2007)
The purpose of learning this is to serve as a guide for placing different
levels of information in the right places. It helps to provide focus in
direction to understand the nuances of typographic layout and composition,
something to handhold during the process of exploration.
8 major variations with an infinite number of permutations are as follows:
1) Axial System: All elements organised to the left or right of
a single axis.
2) Radial System: All elements extended or spread out from a point
of focus.
3) Dilatational System: All elements expand from a central point in
a circular fashion.
4) Random System: Elements appear to have no specific pattern or
relationship, must be looks chaotic but there should be underlying sense of
order and logic within the chaos.
5) Grid System: A system of vertical or horizontal divisions.
6) Transitional System: An informal system of layered banding.
7) Modular System: A series of non-objective elements that are
constructed in as a standardised units. Based on units, and when using
units, they should be consistent in size and interchangeable across the
layout.
8) Bilateral System: All text is arranged symmetrically on a single
axis.

Figure 1.1: Eight Variation of Typographic Systems,
source: 2009, Typographic System by Kimberly Elam (page
7-9), Week 1 (26/04/2025)
There are some additional criteria that come into play in typographical
systems, which are:
1) Hierarchy
2) Reading Order
3) Eligibility
4) Contrast
WEEK 2 - LECTURE 2
Advanced Typography: Typographic Composition
Principles of Design Composition:
1. Emphasis
2. Isolation
3. Repetition
4. Symmetry and asymmetry
5. Alignment
6. Perspective
The Rule of Thirds is used a guide, the intersecting lines are
used as guide to place the points of interest.

Figure 1.2: Implementing Rule of Thirds,
source: Lecture Video Advanced Typography - Typographic
Composition, Week 2 (29/04/2025)
From the 8 typographic systems, the most used system is the Grid System/
Raster System.
Other system that are used:
- Environmental Grid: Based on the exploration of an existing structure or a combination of multiple structures by extracting the crucial lines, both curved and straight line, that are formed.

Figure 1.3: Environmental Grid,
source: Lecture Video Advanced Typography - Typographic
Composition, Week 2 (29/04/2025)
- Form and Movement: Based on the exploration of an existing Grid Systems. To see the turning pages in a book as a slowed-down animation in the form that constitutes the placement of image, text, and color.

Figure 1.4: A More Complex Example of Form & Movement,
source: Lecture Video Advanced Typography - Typographic
Composition, Week 2 (29/04/2025)
WEEK 3 - LECTURE 3
Advanced Typography: Context and Creativity
Handwriting
The shape and line of hand drawn letterforms are influenced by the
tools and materials used.

Figure 1.5: Evolution of the Latin Alphabet.,
source: Lecture Video Advanced Typography - Context & Creativity, Week 3 (06/05/2025)
Cuneiform c. (3000 B.C.E.)
- The earliest system of actual writing.
- Written from left to right to evolved from pictograms.
Hieroglyphics (2613 - 2160 B.C.E.
- Was a mixture of both rebus and phonetic characters, the first link to a future alphabetic system
- Have potential to be used in 3 different ways:
- ideograms: represent the things they actually depict
- determinatives: show that the the signs preceding are meant as phonograms and to indicate the general idea of the word
- phonograms: represent sounds that "spell out" individual words
Early Greek (5th C. B.C.E.)
- The Phoenicians developed a phonetic alphabet consisting of 22 letters.
- Was often read in a format known as boustrophedon or "as the ox plows", one row would read left to right then switch from right to left.
- Drawn freehand, not constructed with rule, and have no serifs.
Roman Uncials (4th century)
- By the 4th century, Roman letters were becoming more rounded, the curved form allowed for less strokes and could be written faster.
English Half Uncials (8th C.)
- Evolved into a more slanted and condense form.
Emperor Charlemagne
- After the fall of the Roman Empire, the end of a central advanced culture resulted in general illiteracy and a breakdown of handwriting into diverse regional styles,
Carolingian Minuscule
- Was used for all legal literary works to unify communication between the various regions of the expanding Europian empire.
Black Letter (12-15 C. C.E.)
- Characterized by tight spacing and condensed lettering.
- Evenly spaced verticals dominated the letterform.
- Condensing line spacing and letter spacing reduced the amount of costly material in book production.
The Italian Renaissance
- The renaissance embrace of ancient Greek and Roman culture spurred a creative wave through Italian art, architecture and letter form design.
- Humanist named the newly rediscovered letterforms in Antica. The renaissance analysis of form that was being applied to art and architecture was directed toward letterform, resulting in more perfect . rationalised letter.
Movable Type (11 C. - 14 C.)
- China had attempted use movable type for printing but was unsuccessful due in part the large number of characters and the materials used, which is clay.
- In late 14 C, the Koreans establish a foundry to cast movable type in bronze, allowed the dismantling and resetting of text.
- To conclude, this innovation was pioneered in China but achieved in Korea (Diamond Sutra)

Figure 1.6: Evolution of the Alphabet,
source: Lecture Video Advanced Typography - Context & Creativity, Week 3 (06/05/2025)
WEEK 4 - LECTURE 4
Advanced Typography: Designing Type
1) Adrian Frutiger - Univers
Adrian Frutiger was a Swiss graphic designer of the twentieth
century, known for his valued contribution to typography,
including Univers and Frutiger typefaces. Frutiger is a sans
serif typeface. The goal of this new typeface was create a
clean, distinctive and legible typeface that is easy to see from
both close up and far away. Extremely functional.
2) Matthew Carter - Georgia & Verdana
Many of Carter's fonts were created to address specific
technical challenges, for example those posed by early
computers. The purpose of the font was to maintain high
legibility, even at very small sizes on the screen due in part
to the popularity of the internet and electronic devices. Off
screen, Georgia & Verdana have also been used in print. In
2010, there was a lot of "frontoversy" when it was announced
that IKEA would be changing from Futura to Verdana.
3) Edward Johnston - Johnston Sans
Edward Johnston, the creator of the hugely influential London
"Underground" typeface, which would later come to be knows as
"Johnston Sans" (1916). He was asked to create a typeface with
"bold simplicity", one that felt modern while still reflecting
traditional values. The purpose was for London's Underground
railway that ordered a new typeface for its posters and signage
from the calligrapher Edward Johnston. He handed over details
and examples of letterforms that would set the tone for printed
text until the present day.
4) Eric Gill - Gill Sans
His former student was perhaps driven by the guilt over the
success of his own typeface, Gill Sans, which he admitted had
been heavily inspired by Johnston's design.
Type Design Process:
1. Research
- When creating type, it is essential to understand type
history, type anatomy and type conventions. We should also have
knowledge about terminologies, side bearing, metrics,
hinting.
- Then, it is important to determine the purpose of the
typeface, considering what it would be used for, what different
applications it will be used in such as whether the typeface is
for school busses or airport signages, etc.
- We should also analyze existing fonts that are presently
being used for inspiration/ideas/reference/context/usage
pattern/etc.
2. Sketching
Some designers prefer sketch their typeface using
traditional tools like brushes, pens, ink and paper.
3. Digitization
Professional software that are used in the digitization of
typefaces are: FontLab and Glyphs App. Some designers also
use Adobe Illustrator to design or craft their letterforms
first, then introduce it into the specialized font apps.
4. Testing
The results of the testing is part of the process of
refining and correcting aspects of the typeface.
Prototyping is also part of the testing process and leads
to important feedback. Depending on the typeface category
(display type/text type) the readability and legibility of
the the typeface becomes an important consideration.
However it is not as crucial if the typeface is a display
type, where expression of the form takes a little more
precedence.
5. Deploy
Even after deploying a completed typeface there are always
teething problems that did not come to the fore during the
prototyping and testing phases. Thus, the task of revision
doesn't end upon deployment. The rigour of the testing is
important so that the teething issue remains minor.
Typeface Construction

Figure 1.7: Construction grid for the Roman Capital (8x8
cells),
source: Lecture Video Advanced Typography - Designing
Type, Week 4 (13/05/2025)
Roman Capital letter can be constructed using the grid
system. The grid consists of a square with a circle inside
that touches the square's sidesat four places. Within the
square, there is also a rectangle. This rectangle is three
quarters the size of the square and is positioned in the
centre of the square.
Using grids (with circular forms) can facilitate the
construction of a letterforms and is a possible method to
build/create/design your letterform.
Construction and considerations

Figure 1.8: Construction and considerations,
source: Lecture Video Advanced Typography - Designing
Type, Week 4 (13/05/2025)
Many different forms and constructions must be taken into
account when designing a new type. An important visual
correction is the extrusion of curved (and protruding) forms
past the baseline and cap line. This also applies to vertical
alignment between curved and straight forms.
A visual correction is also needed for the distance between
letters. It is not possible to simply place letters next to
each other with equal spacing between them. The letters must
be altered to a uniform see. 'visual' white space. This means
that the white space between the letters should appear the
same. This is called ‘fitting' the type.
For a design to be successful, the designer must be deeply
invested in the idea, fully understanding the requirement,
limitations, use, and the needs of the stakeholder. Designing
a typeface is a labour of love.
INSTRUCTIONS
Task 1: Exercise 1 - Typographic Systems
In the first exercise, we were given the chance to explore 8 typographic
systems using Adobe InDesign only. Adobe Illustrator was permitted but
only for very specific, limited use. The artboard size should be 200
x 200 mm. In addition to black, we were allowed to use one other color.
Graphical elements could be used, but only to a limited extent.
From the three text options given, I chose the following text:
The Design School,
Taylor’s University
All Ripped Up: Punk Influences on Design
Open Public Lectures:
June 24, 2021
Lew Pik Svonn, 9AM-10AM
Ezrena Mohd., 10AM-11AM
Suzy Sulaiman, 11AM-12PM
June 25, 2021
Lim Whay Yin, 9AM-10AM
Fahmi Reza, 10AM-11AM
Manish Acharia, 11AM-12PM
Lecture Theatre 12
Task 1: Exercise 2 - Type and Play
Part 1
Students will analyse, dissect and identify potential letterforms within the dissected image. The forms would be explored and ultimately digitized. It is expected that through a process of iteration the forms would go from crude representation to a more refined celebration that would reflect to a degree its origins.
Extracted letterforms go from crude representation to a more refined expression but yet maintaining core features of its origin. It is good to have a sample font for direction and reference when refining
Part 2
Upon completing the letterforms, students will combine the letterforms with an image that is the basis of the extracted letters. The objective is to enhance/support the interplay between the letterforms and the selected visual. The text must be woven into a symbiotic relationship with the image.
Task 1: Exercise 1 - Typographic Systems
Visual Research
First of all, I did visual research, mostly using Pinterest. However,
some of my inspirations didn't come from existing layouts, but from
real-life objects. For example, my inspiration for the axial system came
from a zipper. For the transitional system, I was inspired by a rope,
imagining it rotating to guide the flow.

Figure 2.1: References with Sources Included, Week 1 (26/04/2025)
Reference Sources
Axial System
Radial System
Dilatational System
Random System
Grid System
Modular System
Bilateral System
Transitional System
Sketch
I then start sketching my ideas using ProCreate.

Figure 2.2: Sketches, Week 1 (26/04/2025)
InDesign Process
First Attempt - Week 1
Then, I began working in Adobe InDesign, but there were some changes from
my original sketches during the design process in InDesign.
5.jpg)
Figure 2.3: Axial System - Attempt #1, Week 1 (27/04/2025)
6.jpg)
Figure 2.4: Axial System - Attempt #1, Week 1 (27/04/2025)
11.jpg)
Figure 2.5: Radial System - Attempt #1, Week 1
(27/04/2025)
12.jpg)
Figure 2.6: Dilatational System - Attempt #1, Week 1
(27/04/2025)
17.jpg)
Figure 2.7: Random System - Attempt #1, Week 1
(27/04/2025)
10.jpg)
Figure 2.8: Grid System - Attempt #1,
Week 1 (27/04/2025)
9.jpg)
Figure 2.9: Grid System - Attempt #1,
Week 1 (27/04/2025)
.jpg)
Figure 2.10: Modular System -
Attempt #1, Week 1 (27/04/2025)
8.jpg)
Figure 2.11: Bilateral System - Attempt
#1, Week 1 (27/04/2025)
.jpg)
Figure 2.12: Transitional System -
Attempt #1, Week 1 (27/04/2025)
Second Attempt - Week 2 (Revised and Further Exploration)
Mr Vinod accepted most of my work,

Figure 3.1: Compilation of My
First Attempt, Week 2
(28/04/2025)
- Axial System: Mr. Vinod preferred option #2.
- Radial System: Both options were considered acceptable.
- Dilatational System: He liked option #2 but pointed out that the two bold texts at the bottom need to have consistent sizing in spacing like the other.
- Random System: Option #1 is acceptable.
- Grid System: He approved options #2 and #3.
- Modular System: Option #2 was considered decent.
- Bilateral System: Option #1 does not qualify as a bilateral layout, but option #2 is correct.
- Transitional System: Option #1 is okay.
Based on Mr Vinod's feedback, I decided to make improvements
to the random system, as it seemed he wasn't fully satisfied
with my first attempt of random system. To be honest, the
random system has been the most challenging one for me. As
someone who tends to work in an organized way, embracing
randomness doesn't come naturally. Then, in the class Mr.
Vinod said that the random system is the most visually
exciting, but it's also one of the hardest to execute,
especially if you're naturally an organized person. Your
structured mindset might resist the disorder, so it requires a
flip. You have to fully embrace and throw caution to the wind.
Let chaos reign supreme in your work, but should be
underlying sense of order and logic within the
chaos.

Figure 3.2: Random System -
Attempt #2, Week 2 (29/04/2025)
Final Outcome of Typographic Systems

Figure 4.1: Final Axial System - JPEG, Week 2
(29/04/2025)

Figure 4.2: Final Radial System - JPEG, Week 2
(29/04/2025)

Figure 4.3: Final Dilatational System - JPEG, Week 2
(29/04/2025)

Figure 4.4: Final Random System - JPEG, Week 2
(29/04/2025)

Figure 4.5: Final Grid System - JPEG, Week 2
(29/04/2025)

Figure 4.6: Final Modular System - JPEG, Week 2 (29/04/2025)

Figure 4.7: Final Bilateral System - JPEG, Week 2
(29/04/2025)

Figure 4.8: Final Transitional System - JPEG, Week
2 (29/04/2025)
Figure 4.9: Final Task 1 - Exercise 1: Typographic
Systems - PDF, Week 2 (29/04/2025)
Figure 4.10: Final Task 1 - Exercise 1:
Typographic Systems Grids and Guides -
PDF,
Week 2 (29/04/2025)
Task 1: Exercise 2 - Type and Play Part 1
Finding an Image
First of all, I needed to choose a subject to
extract. Then the idea of 'Jepara wood carving' came to my mind, as
carvings are naturally form letter-like shapes. The idea came
to me because Jepara is a city in Indonesia, which located on
the northern coast of Central Java. It is famous for its wood
carving industry.

Figure 5.1: Chosen Subject, source:
Ukiran - Jepara, Week 2 (03/05/2025)
Extraction
Then, I began extracting the letterforms and modifying
them using pen Tool in Adobe Illustrator.

Figure 5.2: Letterform Extraction, Week 2
(03/05/2025)
I chose ITC New Baskerville Std Roman as
the reference font.

Figure 5.3: Reference Font, Week 2 (03/05/2025)
Refinement Process - First Attempt

Figure 5.4: Adobe Illustrator Process, Week 2
(03/05/2025)

Figure 5.5: Refinement Process with Baseline, Week 2
(04/05/2025)
-2%202.jpg)
Figure 5.6: Process Compiled, Week 2 (04/05/2025)
From the feedback, Mr. Vinod noted that there’s some
things to sort out in the design. For the letter ‘c’, he
pointed out that a small point on the lower left side is
too sharp. He mentioned that the letter ‘d’ is good
overall but suggested reusing some parts to maintain
consistency, and when doing a mirror, make sure to pay
attention to the consistency of the thickness. When I
asked if it was okay to create a letter from separate
alphabets I noticed in the design, he confirmed that
yes, you may do such things.
Refinement Process - Second Attempt (Revised and
Further Exploration)
Since Mr Vinod say that it was okay to create a letter
from separate alphabets I noticed in the image,
so I decided to remove the extracted letter 'd' and
extract letter 'l' because letter 'd' should actually
be constructed from the combination of the letter 'l'
and a flipped 'c'. Here is what I did"
- Made the letter 't' using the letter 'l' and created the top line by rotating two 'c' letters.
- Formed the letter 's' from two letter 'c'
- Created the letter 'p' by rotating the letter 'l' and adding a letter 'c' to form the bowl

Figure 5.7: An additional extraction: letter "l",
Week 3 (06/05/2025)

Figure 5.8: Refinement Process with Baseline
(Revision), Week 3 (06/05/2025)
-3%202.jpg)
Figure 5.9: Process Compiled (Revised), Week
3 (06/05/2025)
Final Outcome of Type and Play Part 1
Figure 5.10: Extraction, Week 3 (06/05/2025)

Figure 5.11: Refining Process, Week 3 (06/05/2025)
-8%204.jpg)
Figure 5.12: Reference Font, Week 3 (06/05/2025)
-8%202.jpg)
Figure 5.13: Extracted Letterforms
(baseline), Week 3 (06/05/2025)
-8%203.jpg)
Figure 5.14: Final Letterform, Week 3 (06/05/2025)
-8%205.jpg)
Figure 5.15: Original extraction (top)
and final letterform (bottom)
comparison, Week 3 (06/05/2025)
Figure 5.16: Final PDF
Letters, Week 3 (06/05/2025)
Task 1: Exercise 2 - Type and Play Part
2
After finishing the letterforms, I started
working on the poster. For the background, I
searched for a sculpted painting on
Google.

Figure 6.1: Original Photo (source: https://pin.it/11i1W5Wfr), Week 3 (06/05/2025)
First Attempt
Then, I proceeded to Photoshop,
where I cropped the original photo
to 1024px by 1024px and applied
filters. I used black & white
filter, adjusted the
hue/saturation, and also modified
the brightness & contrast to
achieve the desired background
color.

Figure 6.2: Process in Photoshop, Week 3
(06/05/2025)
Then, I moved to Adobe Illustrator. To
begin, I inserted the background I had
edited earlier, then I added the letterforms
I had created. Next, I applied gradient
color to the text to enhance its visual
appeal and match the 'sculpt' title, also I
applied a white color outline. I then added
the 'DTS', 'Dolby', and 'Parents Strongly
Cautioned' logo, as what Mr. Vinod
instructed in class.

Figure 6.3: Process in
Illustrator, Week 3
(07/05/2025)
.jpg)
Figure 6.4: Task 1 - Exercise 1: Type
and Play - JPEG, Week 3
(07/05/2025)
Second Attempt (Revised and
Further Exploration)
Mr. Vinod said that it
was a good attempt, but
the text is not really
legible. You can make
the title more
prominent. So I decided
to adjust the brightness
and contrast of the
background in
Photoshop.

..jpg)
Figure 6.6: Task 1 - Exercise 1:
Type and Play -
JPEG, Week 4 (13/05/2025)
Final Outcome of
Type and Play Part
2
..jpg)
Figure 6.7: Final Task 1 - Exercise 1: Type and Play - JPEG,
Week 4 (13/05/2025)
Figure 6.8: Final Task 1 - Exercise 1: Type and Play - PDF,
Week 4 (13/05/2025)
FEEDBACK
WEEK 1
General Feedback: Mr. Vinod briefed us about the Module
Information Booklet and the rules, and he explained our first task. He
instructed us to carefully read the post on Teams, watch the pre-recorded
lecture and tutorial videos provided, and complete some exercises before
the upcoming week.
WEEK 2 (EXERCISE 1: TYPOGRAPHIC SYSTEMS)
Specific Feedback:
- Axial System: Mr. Vinod preferred option #2.
- Radial System: Both options were considered acceptable.
- Dilatational System: He liked option #2 but pointed out that the two bold
texts at the bottom need to have consistent sizing in spacing like the
other.
- Random System: Option #1 is acceptable.
- Grid System: He approved options #2 and #3.
- Modular System: Option #2 was considered decent.
- Bilateral System: Option #1 does not qualify as a bilateral layout, but
option #2 is correct.
- Transitional System: Option #1 is okay.
WEEK 3 (EXERCISE 1: TYPE & PLAY PART 1)
General Feedback: Mr. Vinod mentioned multiple times the
importance of maintaining consistency in the construction of each
letter, especially in terms of thickness.
Specific Feedback: Mr. Vinod said that my work is interesting
and that he liked how I chose something very creative. However, he
noted that there’s some things to sort out in the design. For the
letter ‘c’, he pointed out that a small point on the lower left side
is too sharp. He mentioned that the letter ‘d’ is good overall but
suggested reusing some parts to maintain consistency, and when doing a
mirror, make sure to pay attention to the consistency of the
thickness. When I asked if it was okay to create a letter from
separate alphabets I noticed in the design, he confirmed that yes, you
may do such things.
WEEK 4 (EXERCISE 1: TYPE & PLAY PART 2)
General Feedback: Mr. Vinod mentioned the importance of
margins again. He also emphasized that the key is to always try your best
and not let harsh feedback get you down. The purpose of the feedback is
not to break you, but to help you learn from it. It's important to apply
those skills and that knowledge in the workplace. Focus less on grades and
more on the work you are doing.
Specific Feedback: It was a good attempt, but the text is not
really legible. You can make the title more prominent.
REFLECTION
Experience
For exercise 1, to be honest, I felt quite overwhelmed as I needed to
finish 8 typographic systems in a week. I was worried that my work
wouldn't be accepted by Mr. Vinod, so I decided to create multiple options
for each layouts as a plan B. However, in class, I learned the most
important lesson, which is to be confident in my own work and to trust my
own judgement, even towards our own work. What really hit me was when Mr.
Vinod said, "What's the point of getting an A if you learn nothing? Do not
be afraid to make mistakes, learn to trust your own judgement towards your
work as you need those things later on at work. Do not always rely on my
judgement because you won't upgrade and learn." Since that moment, I've
felt a greater sense of freedom in doing my task. I've stepped out of my
comfort zone and become more confident in coming up with different ideas,
just like the carved painting I chose for extracting letterforms in the
'Type and Play' exercise. Usually I tend to come up with ideas similar to
the samples Mr. Vinod provided. Mr. Vinod gave us a leaf picture to
extract as an example, and typically I would look for similar ideas. But
this time, I chose something different, and turns out that Mr. Vinod liked
how I chose something very creative and interesting. However, there was
still a lot to revise in that work, but because Mr. Vinod statement
earlier, I am now learning from every mistakes I make. I agreed that GPA
is important, but now my perspective has shifted. I value the lessons I
learn from my mistakes more, lessons that will stay with me and help me
avoid repeating them. Thanks to Mr. Vinod, for pushing us in that
way.
Observations
From 'Typographic Systems' exercise, I observed that balance plays a
crucial role in arranging layouts. This task helped me to notice the
importance of leading, alignments, etc. It also makes me to recall the
lesson I learned in the first semester. While from 'Type and Play'
exercise, I realized that incorporating meaning into a design
significantly enhances its value.
Findings
I found that this exercise really pushed myself to explore more than I
used to be and come up with different ideas. I started stepping out my
comfort zone since the 'Type and Play' exercise, the moment after Mr.
Vinod shared the lessons I mentioned earlier. I realized that exploring
can actually be really fun and turns out I found myself can come up with
unusual ideas. I found that these exercises helped me and pushed me to
dig deeper into my potential.
FURTHER READING
Elam, K. (2007). Typographic Systems. Princeton Architectural Press,
New York
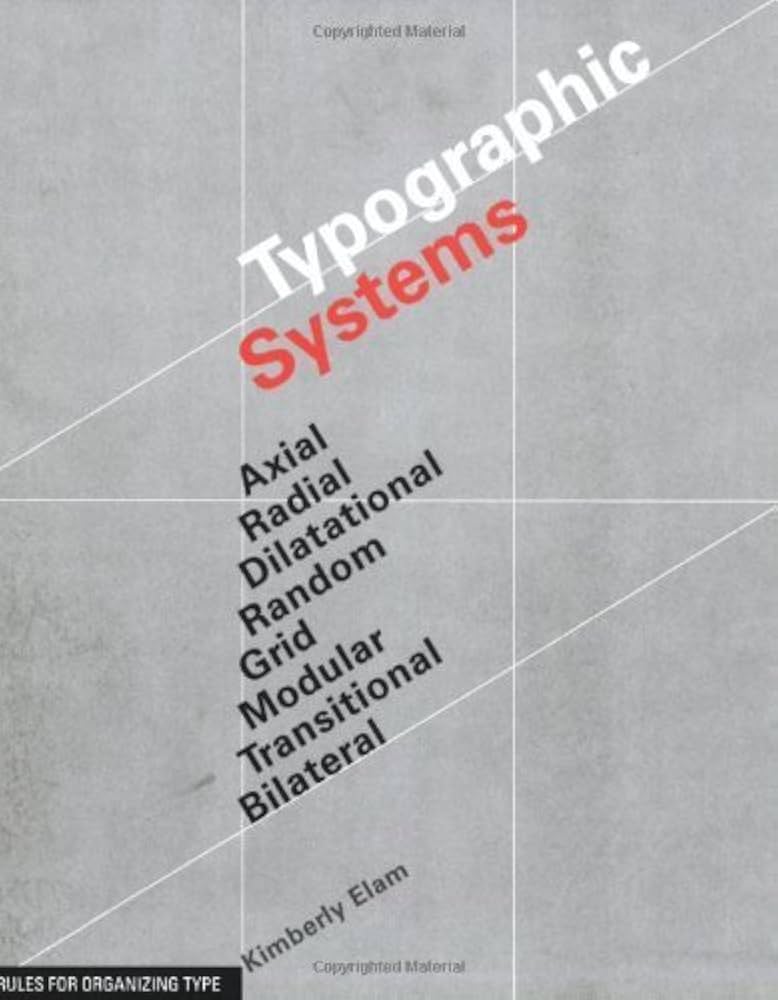
Figure 7.1: Typographic Systems by Kimberly Elam (2007), Week 2 (04/05/2025)
In the process of making the random system, I had difficulties because I
have no idea how to think random, so I read this book in order to have
deeper understanding about this system.

Figure 7.2: Random System (Page 72), Week 2 (04/05/2025)
Random System (Page 70 - 85)
- Nonobjective Elements
- These elements need to appear as free and unconstrained as the text in their form and placement.
- They can modify a word or line and improve communication in visually chaotic environment.
- Shaped Background
- Incorporating a shaped background with unexpected angles adds complexity to the composition.
- Repetition
- Repetition can create engaging compositions, while excessive repetition of type elements in pursuit of an interesting textural composition rapidly leads to loss of communication.
Comments
Post a Comment